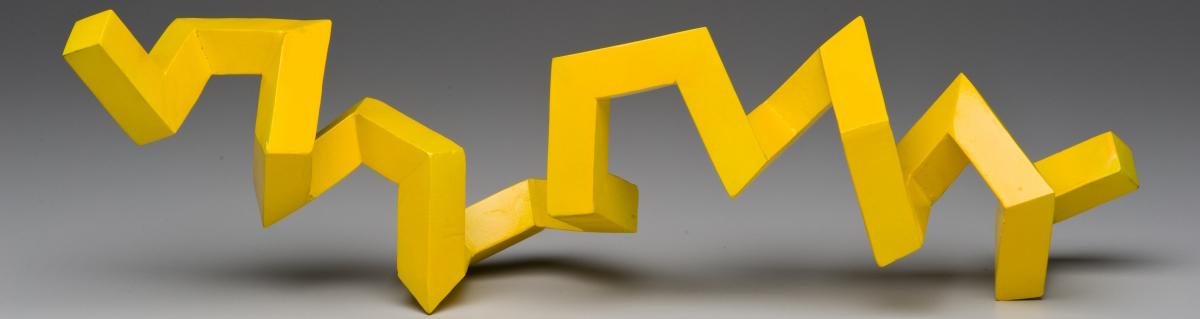
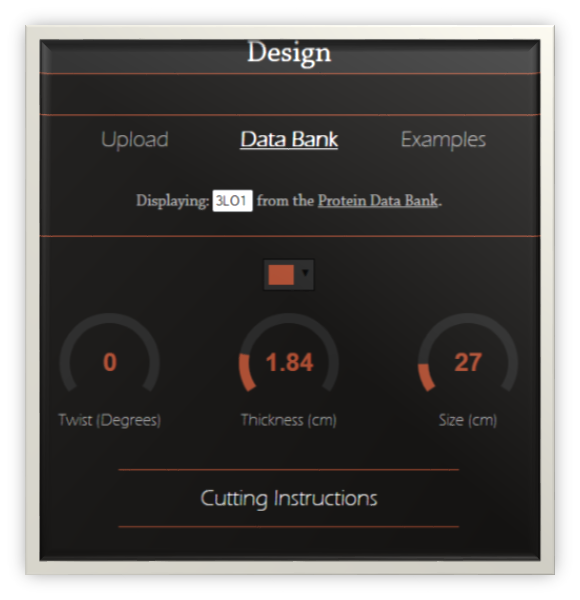
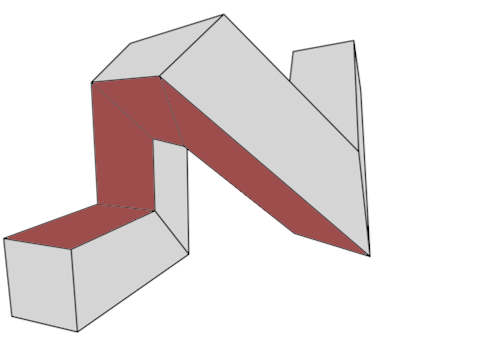
Start small by building one of our examples. The more complex the protein, the more problems may arise with small cutting errors. Once you are comfortable with the process, load a protein from the protein databank, or upload your own custom structure.
2. Adjust “thickness” to match the width of your material.
Any material that can be cut with a miter or hand saw will work, but the sides must be square. Consider starting with a standard wood thickness like ¾” (1.9 cm)- that way you can buy the correct thickness at a hardware store and use a tablesaw or circular saw to cut to the matching width.
3. Adjust the “Size”, “Twist” and color options as needed until you get a design you like.
Rotate the sculpture in the viewport. Visually inspect your design to ensure that none of the pieces intersect!
4. Press “Cutting Instructions” to generate a list of cutting measurements.
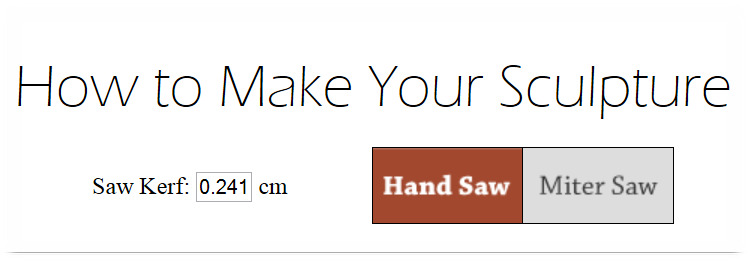
"Report Cuts" should open in a new browser window. Time to make a few adjustments...
The cutting process, using a handsaw:
1. On the “report cuts” page, select the handsaw option.
The best saw for this is a thin-bladed pull saw, sometimes called a dozuki saw or a japanese pull-saw.
2. Enter the saw kerf (i.e., the thickness of the blade).
If you are using a thin-bladed pull saw, you can just enter "0" for the kerf.
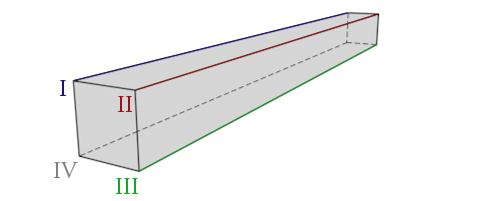
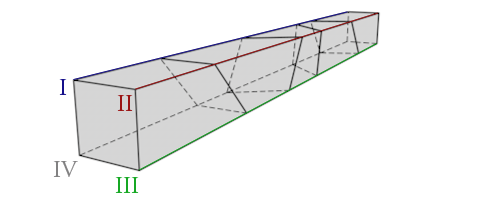
3. Label the four edges of your material in a clockwise fashion: I,II,III and IV.
(see video and images at right).
4. Carefully mark the locations of each cut along each side as listed on the report-cuts page.
5. Connect each set of marks to make a series of cutting planes.
This will separate your material into segments, one for each amino acid in your protein.
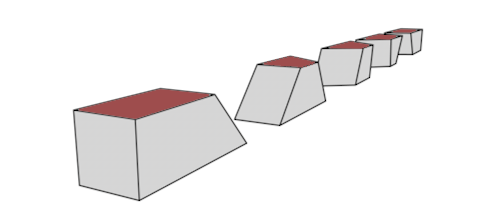
6. Number your segments along one face.
7. Cut along the planes to separate your segments.
The cutting process, using a miter saw:
1. On the “report cuts” page, select the miter saw option.
2. Enter the saw kerf (i.e., the thickness of the blade).
A standard miter-saw blade is 1/8" (or 0.32 cm), but you should double check your own blade to be sure.
3. Label the four sides of your material in a clockwise fashion.
4. Carefully mark the locations of each cut along each side as listed on the report-cuts page.
The building process:
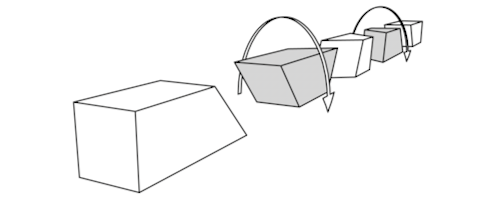
1. Lay out your pieces and flip every other block 180 degrees, using your numbers as a guide.
2. Glue the segments together.
Use a strong, fast drying glue. Hold the pieces together for about 1 minute. If you have an air compressor and pin-nailer that will help things go faster- but be careful not to shoot yourself in the finger! It can help to build the sculpture in stages, letting the glue harden overnight before joining two key segments.